Your Dover home’s basement concrete slab does more than just provide a floor. It serves as the foundation for a dry, usable space that adds value to your property. Whether you’re dealing with a dirt floor that needs upgrading or replacing damaged concrete, understanding the installation process helps you make informed decisions about this critical home improvement project.
This guide walks you through everything Dover homeowners need to know about basement concrete slab installation, from initial preparation to final finishing. You’ll learn what materials matter, which steps you can handle yourself, and when professional expertise becomes essential.
Why Basement Concrete Slabs Matter in New Hampshire
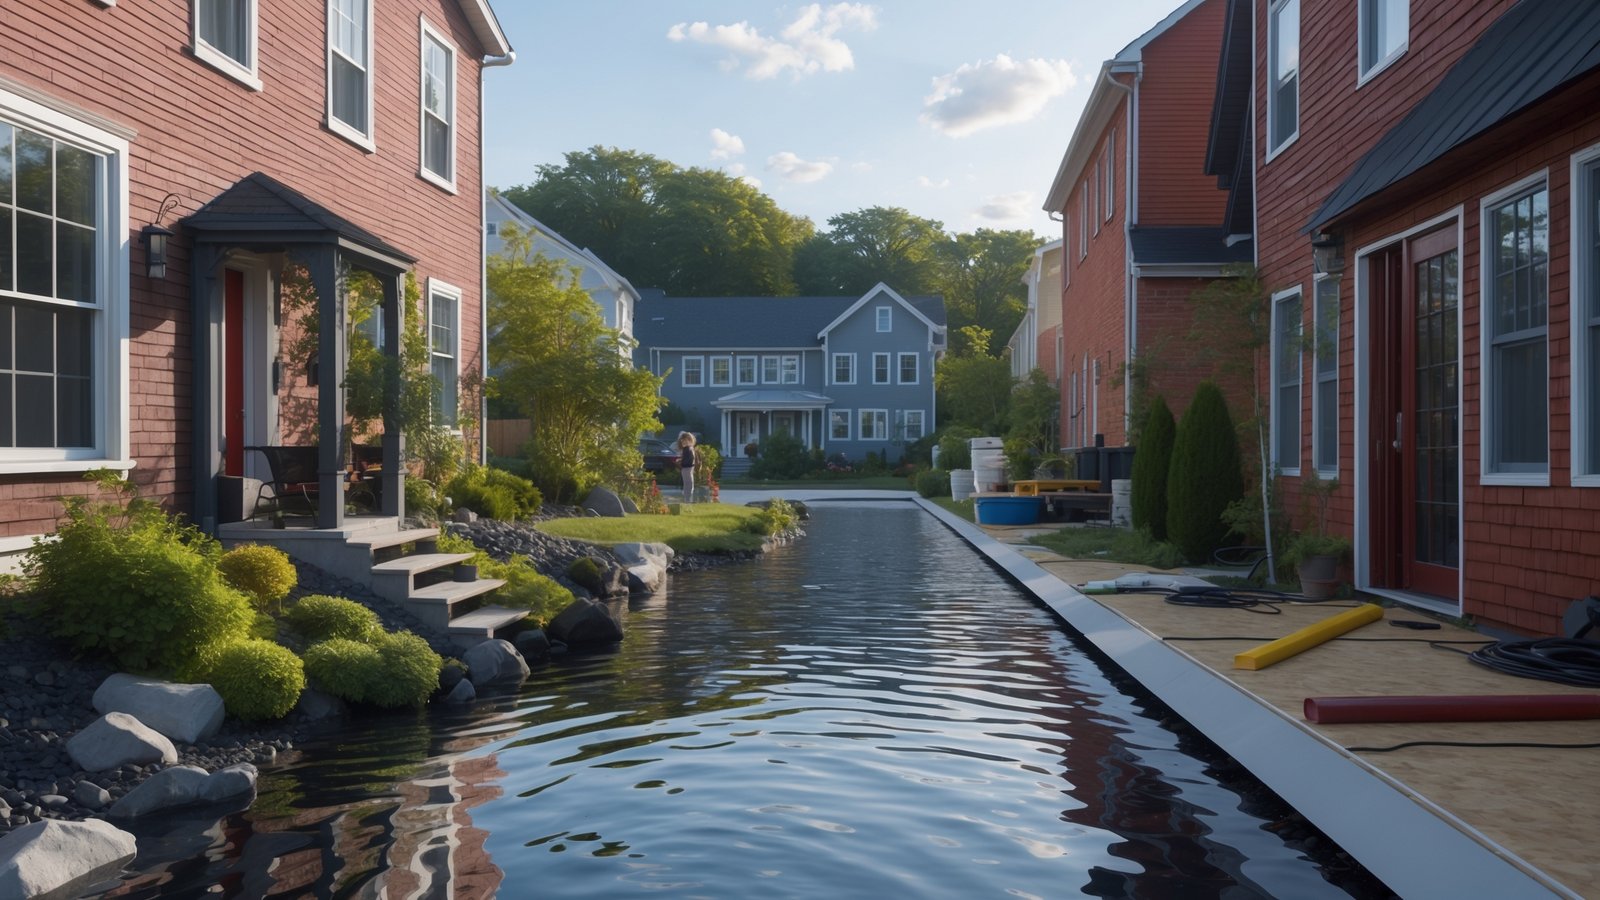
New Hampshire’s climate creates unique challenges for basement floors. Freeze-thaw cycles, high water tables, and seasonal moisture fluctuations put constant pressure on below-grade concrete. A properly installed basement concrete slab protects against these elements while creating a stable, level surface.
Dover’s soil composition includes clay and rocky terrain that can shift over time. Without proper site preparation and drainage, these conditions lead to cracking, settling, and moisture problems that compromise your basement’s integrity.
A quality slab installation also prevents moisture from wicking up through the floor. This protection is critical for maintaining healthy indoor air quality and preventing mold growth. Combined with proper basement waterproofing, your new slab creates a moisture barrier that keeps your space dry year-round.
Site Preparation and Assessment
Before any concrete gets poured, the site requires thorough preparation. This stage determines the long-term success of your basement concrete slab.
Evaluating Your Current Basement Floor
Start by assessing what you’re working with. Dirt floors need complete excavation and grading. Existing concrete requires removal if it shows significant cracking, settling, or moisture damage. Minor surface issues might only need patching, but structural problems demand a full replacement.
Check for standing water, damp spots, or efflorescence (white mineral deposits). These signs indicate drainage issues that must be addressed before installing new concrete. Drainage systems installed around your foundation’s perimeter redirect water away from the slab area.
Excavation and Grading
Proper excavation creates the depth needed for your slab’s layers. A typical installation requires 8 to 12 inches of total depth below your desired finished floor height. This space accommodates gravel base, vapor barrier, insulation if desired, and the concrete itself.
The subgrade (soil beneath the gravel) must be compacted and level. Soft or unstable soil needs additional compaction or removal and replacement with structural fill. High points create weak spots in the finished slab, while low points allow water to pool.
Installing the Gravel Base
A 4 to 6 inch layer of crushed gravel provides drainage and a stable base for your concrete. Three-quarter inch crushed stone works well because it compacts firmly while allowing water to drain through to your perimeter drainage system.
Compact the gravel in 2-inch lifts using a plate compactor. This process removes air pockets and creates a firm, stable surface. Proper compaction prevents settling that would crack your new slab.
Pro Tip: Never skip the gravel base to save money. This layer is critical for drainage and prevents moisture from reaching your concrete through capillary action.
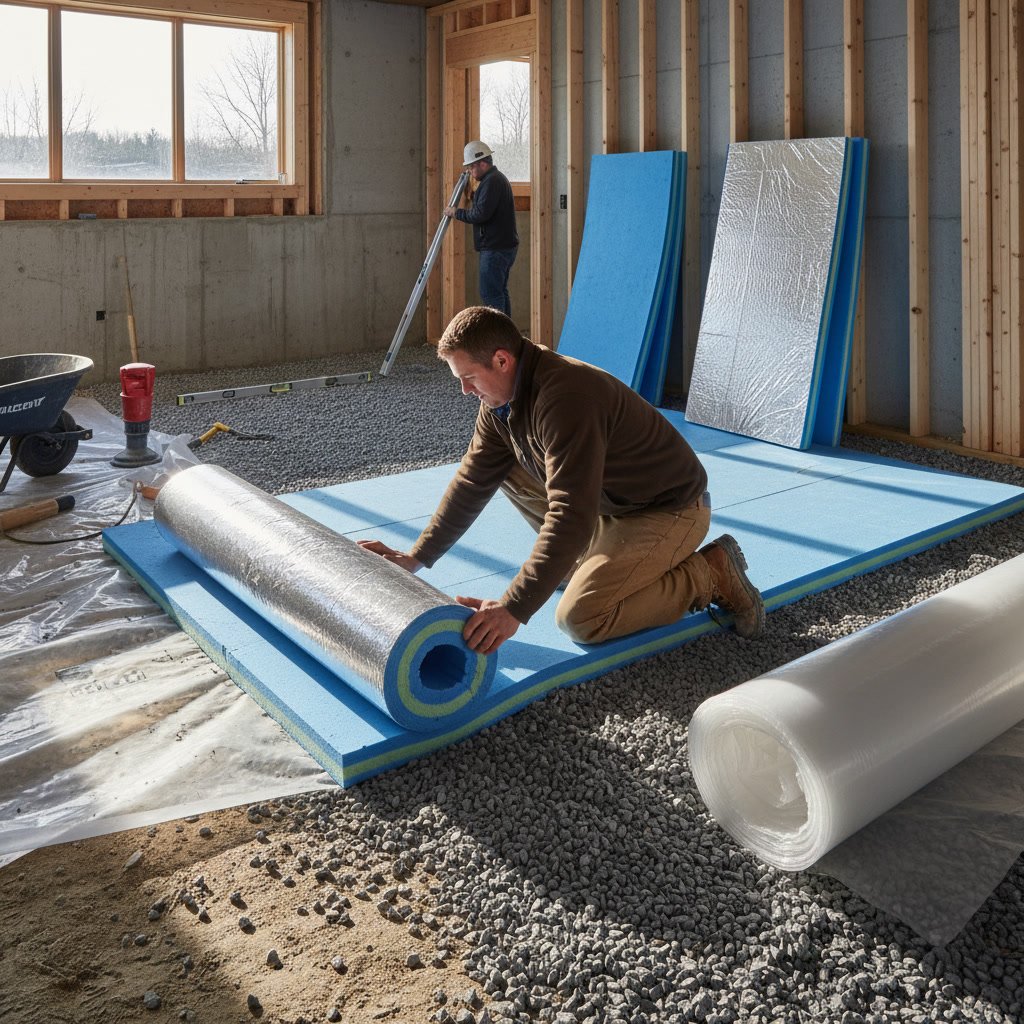
Moisture Barriers and Insulation
New Hampshire’s cold winters and humid summers make moisture protection essential for any basement concrete slab installation.
Vapor Barrier Selection and Installation
A vapor barrier prevents ground moisture from penetrating your concrete. Use 10-mil or thicker polyethylene sheeting rated for below-grade use. Some codes now require 15-mil thickness for added durability.
Overlap seams by at least 12 inches and tape them with moisture-resistant tape designed for vapor barriers. Extend the barrier up the foundation walls several inches. Any punctures or gaps compromise the entire system, so handle the material carefully during installation.
Professional installations often include vapor barrier installation that meets or exceeds local building codes. This investment protects against future moisture problems that cost far more to fix than proper installation.
Insulation Considerations
Rigid foam insulation between the vapor barrier and concrete improves energy efficiency. Two-inch thick extruded polystyrene (XPS) or expanded polystyrene (EPS) rated for below-grade use adds R-10 insulation value.
Insulation makes heated basement spaces more comfortable and reduces energy costs. It also raises the floor’s surface temperature, reducing condensation during humid summer months.
Reinforcement and Concrete Specifications
The concrete mixture and reinforcement determine your slab’s strength and durability.
Choosing the Right Concrete Mix
Basement slabs require concrete with a minimum 3,000 psi compressive strength. Most contractors use 3,500 to 4,000 psi mixes for residential basements. Higher strength concrete costs slightly more but provides better durability and crack resistance.
The water-cement ratio affects strength and workability. Lower water content creates stronger concrete but makes it harder to work. Air entrainment additives help concrete survive freeze-thaw cycles, important for New Hampshire basements that may experience temperature fluctuations.
Reinforcement Options
Steel reinforcement adds tensile strength to your basement concrete slab. Welded wire mesh (WWM) in 6×6 inch 10-gauge grid provides basic reinforcement for residential slabs. Position the mesh in the upper third of the slab for maximum effectiveness.
Rebar offers stronger reinforcement for larger areas or problem soils. Number 3 or 4 rebar spaced 18 to 24 inches on center in both directions creates a strong grid. Use rebar chairs to support the steel at the proper height during the pour.
Fiber reinforcement mixed into the concrete provides additional crack control. Synthetic fibers distribute throughout the mix and help control plastic shrinkage cracking during curing.
Slab Thickness
Most residential basement slabs are 4 inches thick. This thickness handles normal residential loads without problems. Areas that will support heavy equipment or storage may need 5 or 6-inch thickness.
Thicker isn’t always better. Excessive thickness adds cost without benefit for typical basement use. The base preparation and reinforcement matter more than raw thickness for preventing cracks.
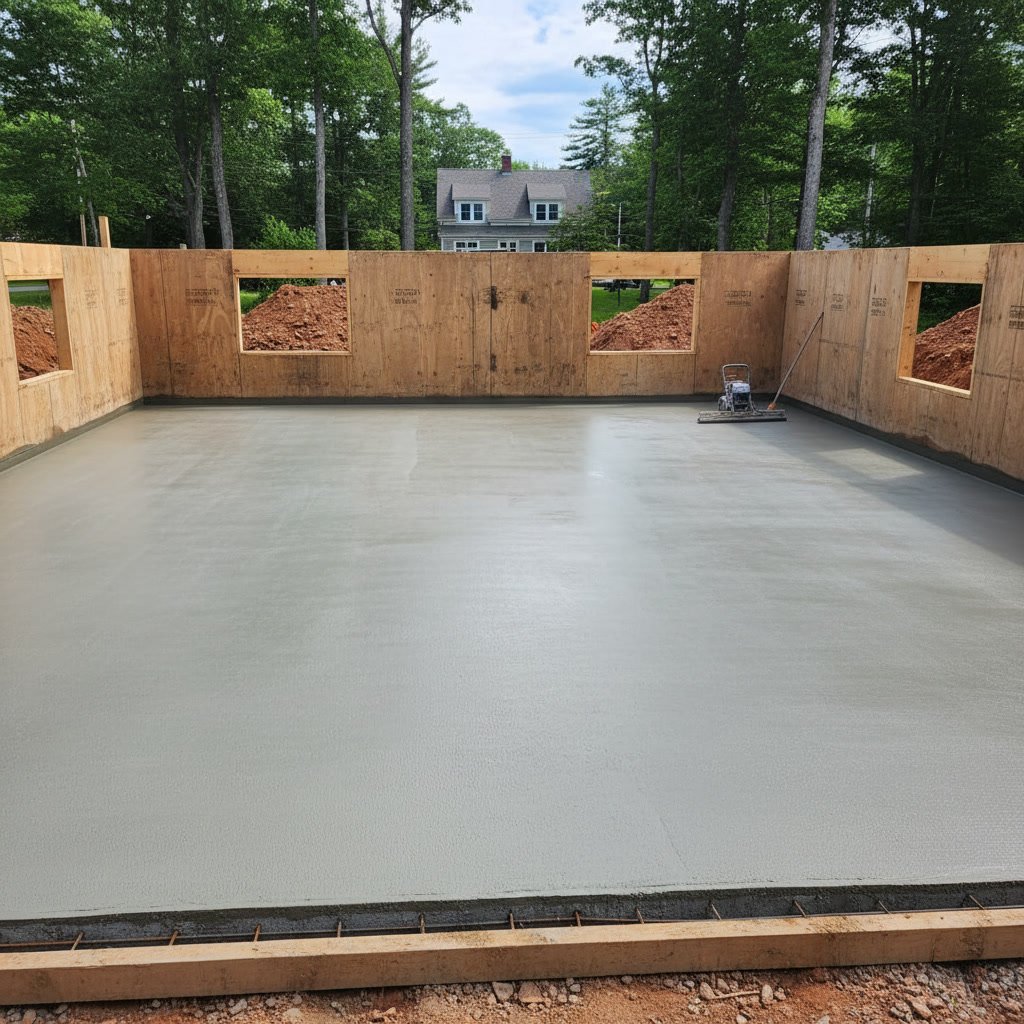
The Concrete Pour Process
Pouring and finishing concrete requires careful timing and technique. This stage transforms your prepared site into a functional floor.
Scheduling and Logistics
Plan your concrete delivery for mild weather when possible. Temperatures between 50 and 80 degrees Fahrenheit provide ideal curing conditions. Cold weather requires special mixes and protection, while hot weather demands extra attention to prevent rapid drying.
Calculate concrete volume accurately. A 4-inch thick slab requires 1.23 cubic yards per 100 square feet. Order 5 to 10 percent extra to account for variations in base height and waste.
Arrange direct access for the concrete truck whenever possible. Pumping concrete into basements adds expense but may be necessary if direct access isn’t available. Have extra labor ready because concrete won’t wait.
Pouring and Spreading
Start pouring in the corner farthest from the access point. Work systematically to avoid cold joints where separate pours meet. Use rakes to spread concrete evenly, maintaining consistent thickness throughout.
Consolidate the concrete to eliminate air pockets. This step ensures the concrete flows around reinforcement and fills all voids. Avoid over-working the concrete, which brings excess water to the surface.
Screeding and Floating
Screed the concrete using a straight board or mechanical screed to create a level surface. Work the screed in a sawing motion while pulling it across the slab. This process removes excess concrete and fills low spots.
Bull floating follows screeding and smooths the surface further. Float the slab before surface water appears. This step embeds aggregate just below the surface and creates a smooth, workable finish.
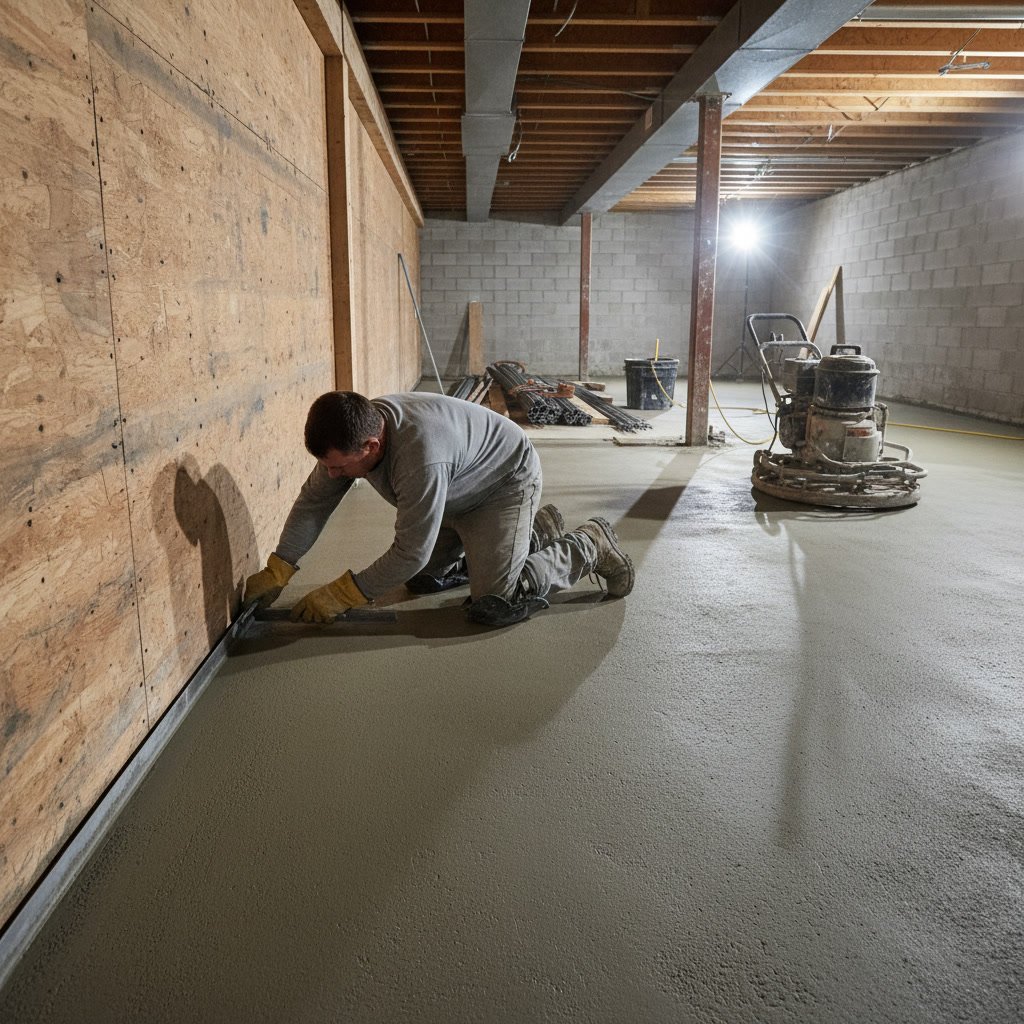
Finishing and Edging
Wait until surface water evaporates before final finishing. Premature finishing causes surface defects and weakens the concrete’s top layer. The timing varies based on temperature, humidity, and concrete mix.
Power troweling creates a smooth, dense surface suitable for most basement uses. Hand troweling works for smaller areas. Some homeowners prefer a broom finish for added slip resistance.
Edge the slab’s perimeter where it meets foundation walls. This detail creates a neat edge and prevents chipping. Control joints cut or tooled into the surface allow the concrete to crack in predetermined locations rather than randomly.
Key Takeaway: Control joints should be spaced at intervals equal to 2 to 3 times the slab thickness in feet. For a 4-inch slab, place joints every 8 to 12 feet in both directions.
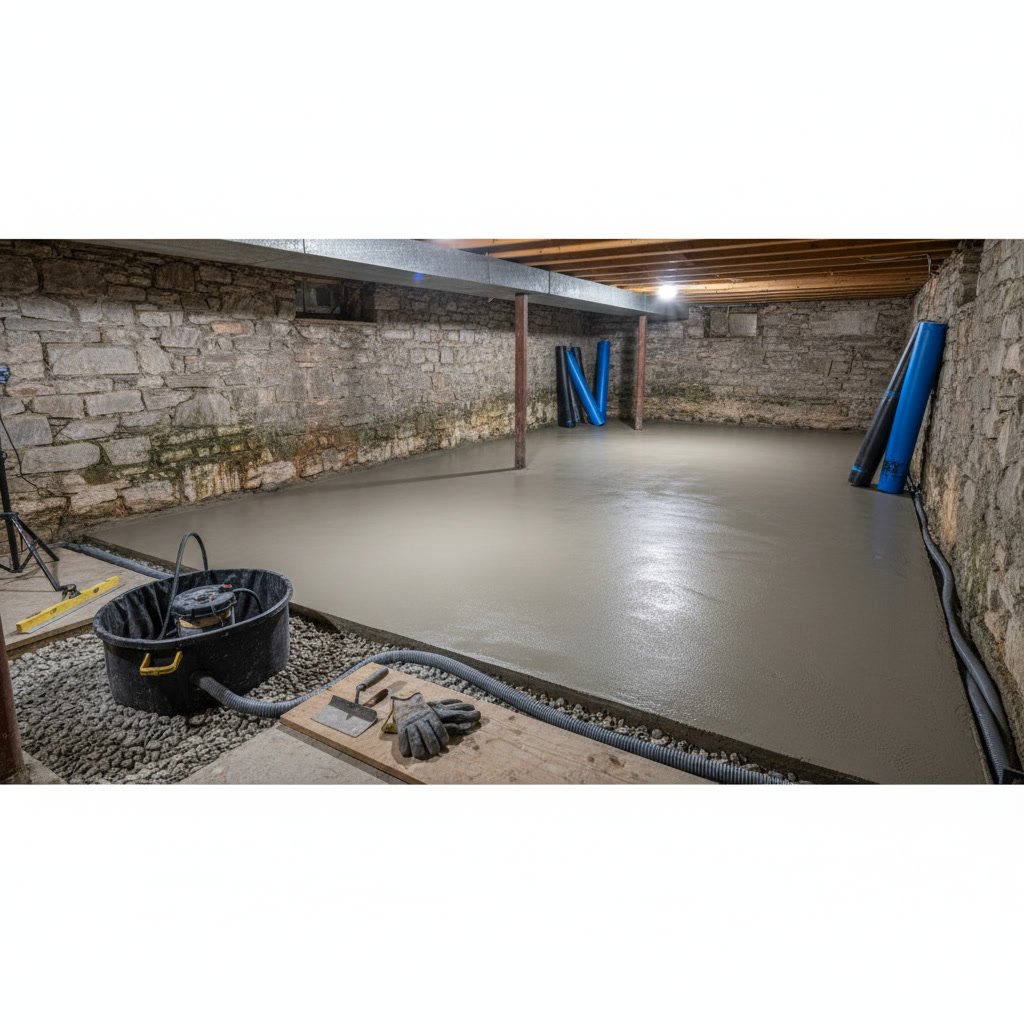
Curing and Protection
Proper curing develops your concrete’s full strength and durability. This stage often gets shortcut, leading to problems later.
Initial Curing Period
Keep the concrete moist for at least seven days. Moist curing allows the chemical hydration process to continue, building strength. Plastic sheeting laid over the slab traps moisture. Alternatively, spray the surface with water several times daily.
Curing compounds applied to the surface seal in moisture. These products work well for basement slabs where wet curing isn’t practical. Follow manufacturer instructions for application rates and timing.
Temperature Control
Protect new concrete from freezing for at least four days. Cold weather requires insulated blankets or temporary heat to maintain proper curing temperatures. Hot weather needs extra watering or wet burlap to prevent rapid moisture loss.
Avoid traffic on the new slab for at least three days. Light foot traffic is acceptable after that, but wait 28 days before placing heavy loads. Concrete continues gaining strength for months, but reaches 90 percent of final strength in the first month.
Common Problems and Solutions
Understanding potential issues helps you avoid them or address them quickly.
Cracking
Some cracking is normal as concrete shrinks during curing. Fine hairline cracks usually don’t affect structural integrity. Wider cracks or those that show vertical displacement may indicate foundation settlement or inadequate base preparation.
Control joints guide where cracks occur. Random cracking often results from joints spaced too far apart, concrete that’s too wet, or insufficient curing. Deep cracks may require professional evaluation to determine if underlying drainage issues exist.
Moisture Issues
Moisture appearing on your new basement concrete slab indicates problems with the vapor barrier, perimeter drainage, or both. Water can’t be trapped behind finished walls where it causes mold and structural damage.
Address moisture problems before finishing your basement. This may require installing or improving perimeter drainage, adding sump pumps, or repairing foundation cracks. Professional moisture testing determines the source and severity.
Surface Defects
Scaling, spalling, or dusting on the surface usually results from finishing the concrete too early, using too much water in the mix, or inadequate curing. Minor surface problems can be repaired with concrete overlays or coatings.
Preventing surface defects through proper installation techniques costs far less than repairs. This is one reason many homeowners choose professional installation for their basement concrete slab projects.
DIY vs Professional Installation
Deciding whether to tackle this project yourself or hire professionals depends on several factors.
Skills and Equipment Required
Installing a basement concrete slab requires excavation equipment, compaction tools, concrete finishing tools, and multiple workers for the pour day. The work is physically demanding and timing-critical once concrete arrives.
Mistakes in site preparation, concrete mix, or finishing techniques lead to expensive problems that develop over time. Professionals bring experience that helps them anticipate and avoid issues before they occur.
Cost Considerations
Professional installation costs $4 to $8 per square foot for basic slabs in the Dover area. This price includes labor, materials, site preparation, and finishing. Complex projects with extensive drainage work or difficult access cost more.
DIY installation saves labor costs but requires tool rental and material purchase at retail prices. The learning curve means your first slab takes longer and may have imperfections that reduce your basement’s value. For more insight into professional waterproofing costs, check out our guide on basement waterproofing costs in New Hampshire.
Permits and Inspections
Dover building codes require permits for basement concrete slab installations in most situations. Permit requirements ensure work meets minimum safety standards and protect your home’s value. Professional contractors handle permit applications and coordinate required inspections.
Unpermitted work can cause problems when selling your home or filing insurance claims. The small permit fee provides documentation that work was done correctly and inspected.
Integrating Your Slab with Waterproofing Systems
A new basement concrete slab works best as part of a comprehensive moisture management system.
Perimeter Drainage
Interior perimeter drains installed before pouring your slab collect water and direct it to a sump basin. This system intercepts groundwater before it can pressure your foundation walls or seep through floor cracks.
The drain pipe sits on the foundation footing, below your new slab elevation. A layer of washed stone surrounds the pipe and allows water to flow freely. The system connects to your sump pump location for removal.
Additional Protection Measures
Beyond the slab itself, consider systems that maintain a dry, healthy basement environment. Basement dehumidification equipment controls humidity levels that lead to condensation and mold growth.
Proper ventilation systems circulate air and prevent the stale, musty conditions common in finished basements. These systems work together with your new slab to create a comfortable, usable space.
Maintaining Your Basement Concrete Slab
Proper maintenance extends your slab’s life and preserves your basement’s condition.
Regular Inspections
Check your basement concrete slab twice yearly for new cracks, moisture, or surface deterioration. Small problems caught early cost less to repair than major issues discovered after damage spreads.
Look for signs of water intrusion around the perimeter or at cracks. Efflorescence or damp spots indicate drainage problems that need attention. Address these issues promptly to prevent damage to finished spaces or stored belongings.
Sealing and Coating
Concrete sealers protect your slab’s surface from moisture, stains, and wear. Penetrating sealers soak into the concrete and provide protection without changing appearance. Film-forming sealers create a protective layer on the surface.
Apply sealer according to manufacturer recommendations, typically every two to five years depending on basement use and traffic. Clean the surface thoroughly before sealing to ensure proper adhesion.
Addressing Repairs Promptly
Small cracks can be filled with epoxy or polyurethane injection. Larger structural issues may require professional assessment and repair. Don’t ignore problems hoping they’ll stabilize on their own.
Foundation settlement, drainage failure, or freeze-thaw damage gets worse over time. Early intervention prevents minor repairs from becoming major demo and removal projects.
Frequently Asked Questions
How long does it take to install a basement concrete slab?
Site preparation typically takes two to four days depending on your basement’s condition and size. The concrete pour and finishing happens in one day. Curing requires at least seven days before light use and 28 days before full loading. Total project time from start to finish ranges from two to three weeks including proper curing time.
Can I install a basement concrete slab over an existing floor?
Installing a new slab over an existing floor is possible but usually not recommended. The additional height reduces headroom and may create drainage problems. If the existing slab has significant damage or moisture issues, those problems will affect the new layer. Removing the old concrete and starting fresh typically provides better long-term results.
What causes basement concrete slabs to crack?
Shrinkage during curing causes fine hairline cracks in nearly all concrete. Wider cracks result from foundation settlement, inadequate base preparation, missing or poorly placed control joints, or freeze-thaw cycles in concrete exposed to moisture. Proper installation techniques and moisture protection minimize problematic cracking.
Do I need a sump pump with my new basement slab?
Most Dover homes benefit from sump pump systems even with new concrete slabs. High water tables and New Hampshire’s precipitation patterns create hydrostatic pressure against foundations. A sump pump provides active drainage that protects your investment. The pump location should be planned before pouring the slab so drainage systems can be properly integrated.
How much does basement concrete slab installation cost in Dover?
Professional installation costs $4 to $8 per square foot for basic projects in the Dover area. A typical 1,000 square foot basement runs $4,000 to $8,000 including materials and labor. Complex projects requiring extensive drainage work, difficult access, or additional moisture protection cost more. Get detailed estimates that include all preparation, materials, and finishing work.
Working with Local Professionals
Your basement concrete slab represents a significant investment in your Dover home. The foundation of any successful installation starts with proper site assessment, quality materials, and experienced execution.
NH Dry Basement LLC provides complete basement solutions throughout the Dover area and surrounding communities. Our family-owned business understands New Hampshire’s unique challenges and delivers hometown service with professional results. From initial assessment through final finishing, we handle every aspect of your concrete slab project with care.
Ready to discuss your basement project? Call +16032359598 to schedule a free consultation. We’ll assess your specific situation, explain your options, and provide a detailed estimate for professional installation. Our team serves Dover and the surrounding Seacoast region with reliable basement solutions built to last.